3D Workspace
Home
Assets
Affiliate Program
Sign up/Log in
?
Upgrade
DCC Bridge
Anonymous1773244949
03-14 07:22
Model Name
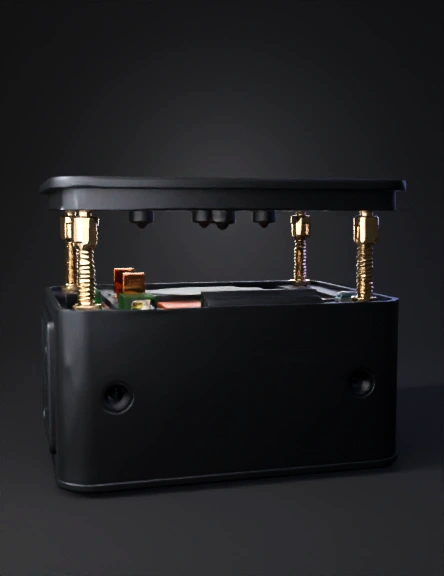
electronic enclosure 3d model
Tags
3d printing
3d printing realistic
electronic enclosure
machine
machine 3d printing
machine 3d printing realistic
machine realistic
realistic
Prompt
Act as an expert industrial designer and create a 3D printable, two-part electronic enclosure (base and lid) for a DIY IoT smart plug. Overall Dimensions & Structure: Outer dimensions: 115mm (Length) x 65mm (Width) x 75mm (Height). Wall thickness: 3mm. The design must be optimized for FDM 3D printing without requiring support structures. Part 1: Main Base (Bottom Enclosure) This section will house high-voltage components (PZEM-004T, HLK-PM01 AC-DC converter, 5V Relay) at the bottom. Include an internal 2mm thick middle shelf/barrier halfway up to physically isolate the high-voltage bottom section from the low-voltage ESP32 board on top. Left Side Wall: Create a 44mm circular cutout with two 3mm screw holes on its left and right edges. This is for a panel-mount Schuko female socket. Right Side Wall: Create a standard rectangular cutout (approx. 27mm x 20mm) for a C14 male power socket. Mounting: Add four thick screw bosses (standoffs) at the inner corners, featuring holes sized for M3 brass heat-set threaded inserts. Part 2: Top Lid Must fit perfectly flush over the main base. LED Holes: Create three 5.2mm circular holes aligned in a row on the top surface for 5mm LEDs. Ventilation: Create a small ventilation grille (parallel slits) in one corner. This is for a DHT4 temperature sensor to measure outside air without being affected by internal heat. Mounting: Add four countersunk screw holes at the corners that perfectly align with the base's standoffs to secure the lid with M3 screws.
Detailed Info
Related Models
Enter invite code
Enter invite code to get credits!