3D Workspace
Home
Assets
Affiliate Program
Sign up/Log in
?
Upgrade
DCC Bridge
Anonymous1762362819
11-05 17:16
Model Name
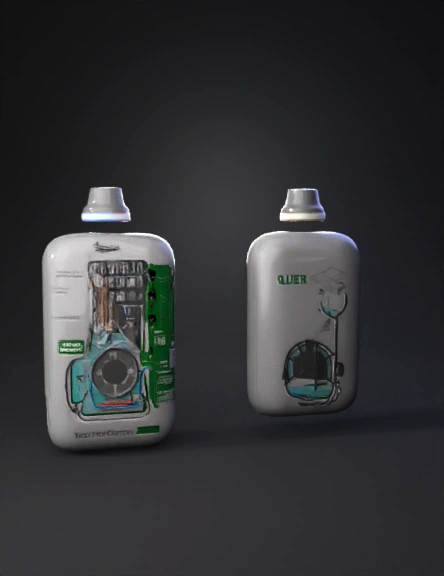
handheld vaporizer 3d model
Tags
machine
machine realistic
machine rendering
machine rendering realistic
realistic
rendering
rendering realistic
vapor
Prompt
Create a highly realistic, engineering-accurate 3D model of a handheld smart wellness vapor device called “Quxes” sized 12.0 cm long × 4.0 cm diameter. Shape: smooth capsule with soft rounded edges and a smoked ergonomic mouthpiece. The outer shell must be semi-transparent polycarbonate (glossy) so all internal components are visible and correctly positioned with logical clearances. Export in 1:1 real units and name exported nodes. Exterior • Top: smoked transparent mouthpiece with dual micro airflow vents. • LED halo ring under the mouthpiece (emissive lights: blue/white/purple). • Front: 1.0″ vertical OLED window (show placeholder text), centered fingerprint sensor ring with green LED halo. • Right side: Type-C port cutout and mic pinhole. • Base: aluminum end cap with cooling vent holes. Internal layout / cutaway (visible and labeled) — use accurate relative positions: Top / Upper (mouth → mid) • Central vaporization chamber directly under mouthpiece — include a nano-ceramic coil cartridge inside a small ceramic housing and a condensation/drip trap above the mouthpiece. Label: “Ceramic Coil”. • Four vertical flavor pods placed symmetrically around the vapor chamber (two front, two rear), color coded and translucent: – Slot 1 Mint (mint-green, left-front) – Slot 2 Butterscotch (gold, right-front) – Slot 3 Citrus (orange, left-rear) – Slot 4 Icy Menthol (icy-blue, right-rear) • Each pod has a screw refill cap, optical liquid level sensor, and a micro-peristaltic pump (mounted near pod). Show flexible tubing from each pump to a central mixing manifold feeding the coil. Label each tube: “Liquid Path — Slot X”. • Add a small inline flow/pressure sensor near the manifold labeled “Flow Sensor / Draw Detector”. Middle (electronics / air path core) • Vertical main PCB on the right side (centered vertically) labeled “AI Core / Flow Controller” with distinct components visible: ESP32-style MCU, ATECC secure element, MOSFET drivers, watchdog. Show antenna trace area with 6 mm clearance from metal. • A compact micro-fan at the bottom of air intake feeding the manifold (for oxygen-simulation airflow). Next to fan place a small metallic cylinder labeled Oxy-Boost (simulation capsule) — not pressurized, clearly marked “Simulation Only”. • Smart flow manifold routing: show air intake → filter stack (HEPA + activated carbon layered filter) → mixing chamber → coil. Label: “Air Path”. Lower (power & safety) • 900 mAh Li-ion battery pack (graphite grey, label text “Li-ion 900 mAh”) placed horizontally under PCB with thermal fuse adjacent to positive terminal. • USB-C charging board at side with wiring harness to battery and PCB. Label “Power / Control Path”. • Magnetic pod contacts behind pod bay and pogo pin pads for service under base service hatch. Functional & visual details • Color-code wiring: red = power, blue = air/control, green = sensors. Make wiring realistic with connectors (JST micro). • Add etched labels close to parts: “Liquid Path”, “Air Path”, “Control Path”, “Thermal Fuse”, “Flow Sensor”, “AI Core”. Keep labels small and readable. • Materials: polycarbonate shell, translucent colored pods, metallic coil texture (ceramic/silver), green PCB, rubber gaskets at pod mounts. • Provide two render modes: full device with cutaway and an exploded view with parts separated (shell removed, components floating in correct relative order). • Include animation nodes (if supported): simple upward vapor particle drift inside the mouthpiece path and halo LED color states. Export requirements • Export format: GLB (glTF binary) — file name Quxes_AI_v1.glb • Include material definitions, emissive maps for LEDs, node names matching component labels, and separate mesh objects for: Shell, Mouthpiece, Pod1..Pod4, Pump1..Pump4, Manifold, Coil, PCB, Battery, USBBoard, Fan, FilterStack, WiringHarness. • Use real-scale coordinates (units in mm). Ensure outer shell and internal parts are separate meshes and the mesh is watertight (no non-manifold edges). Rendering guidance (optional): camera angle three-quarter front and top orthographic for exploded view. High-quality PBR materials, studio lighting, subtle reflections on table surface
Detailed Info
Related Models
Enter invite code
Enter invite code to get credits!