3D Workspace
Home
Assets
Affiliate Program
Sign up/Log in
?
Upgrade
DCC Bridge
Anonymous1760889125
10-19 16:14
Model Name
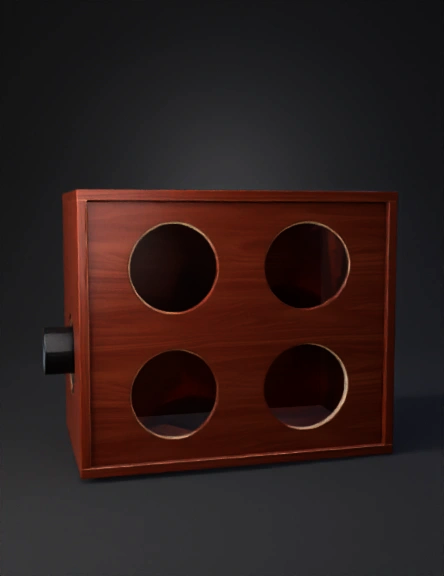
speaker cabinet 3d model
Tags
props
props realistic
props rendering
props rendering realistic
realistic
rendering
rendering realistic
speaker cabinet
wood
wood panel
wooden
Prompt
| **Front Panel** | 1 | 36" W x 12" H | Cut 4x 6.5" speaker holes (5.6" diameter) | | **Back Panel** | 1 | 36" W x 12" H | Solid panel (no holes) | | **Top Panel** | 1 | 36" W x 15" D | No holes | | **Bottom Panel** | 1 | 36" W x 15" D | No holes | | **Side Panels** | 2 | 12" H x 15" D | No holes | | **Port Panel** | 1 | 3" diameter x 12" length | Round port (PVC pipe) | --- ### **Cutting Guide for the Speaker Holes** For each speaker, you’ll need a **5.6" diameter hole**. Here’s how to place them on the **front panel**: * **Top Row (L/R)**: 9" apart, centered. * **Bottom Row (L/R)**: 9" apart, spaced 4" below the top row. You’ll also need a **4" diameter hole** for the port. You can place the port on the **side panel** or **front panel**, depending on your preference. --- ### **2. 3D Mockup** I’ll create a **3D mockup** to visualize the box, showing the layout and placement of the speakers and port. This will give you a clearer view of how everything fits together inside the enclosure. Let me generate that for you. To generate the 3D mockup, you’ll need to log in to ChatGPT. Once you’re logged in, I can create the visual for you right away. In the meantime, I can walk you through the mockup and describe the layout so you can visualize it: * **Front Panel**: Four speaker cutouts, arranged in two rows (top and bottom), each spaced evenly. * **Port**: A 4" diameter port, ideally mounted on the side or rear panel of the box to help with airflow and bass tuning.
Detailed Info
Related Models
Enter invite code
Enter invite code to get credits!